
Skype for Business Online operated by 21Vianet in China will be retired on October 1, 2023. If you haven't upgraded your Skype for Business Online users yet, they will be automatically scheduled for an assisted upgrade. If you want to upgrade your organization to Teams yourself, we strongly recommend that you begin planning your upgrade path today. Remember that a successful upgrade aligns technical and user readiness, so be sure to leverage our upgrade guidance as you navigate your journey to Teams.
Skype for Business Online, excluding the service operated by 21Vianet in China, was retired on July 31, 2021.
If you want to manage user settings in Microsoft Teams, see Manage the Audio Conferencing settings for a user in Microsoft Teams.
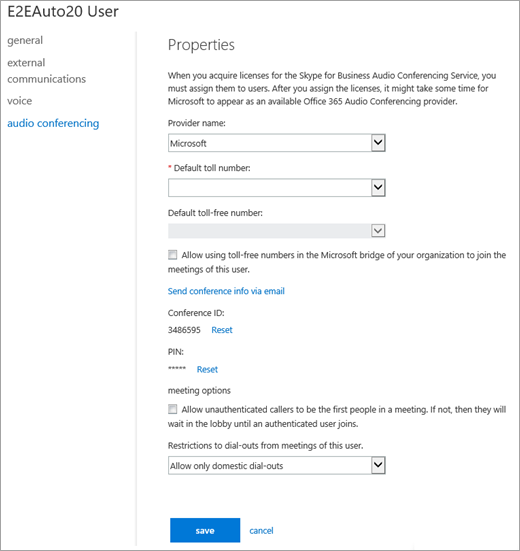
As a Microsoft 365 or Office 365 admin, you can edit the Audio Conferencing settings—such as the provider, default toll or toll-free number, conference ID, or PIN—for an individual user in your organization. If you want to edit settings for your organization, see Manage the Audio Conferencing settings for my organization.
| Setting | Description |
|---|---|
| Provider name | Choose your provider from the list. |
We are frequently updating how you can manage features found in Skype for Business Online, so the steps here might be a little different.