
To quickly jump to another spot in your document or mark important locations, here’s how to add and use bookmarks in Word.
Like in Google Docs, bookmarks in Microsoft Word are convenient ways to mark places in your document. You can link to a bookmark from another spot, letting you quickly jump to it when you need to. This is handy for both you and your reader.
Here, we’ll show you how to create, find, link to, and delete bookmarks in Word.
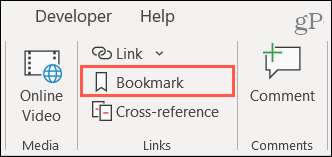
Adding a bookmark in Word takes nothing more than a few clicks. And you can bookmark text, an image, or a specific spot.
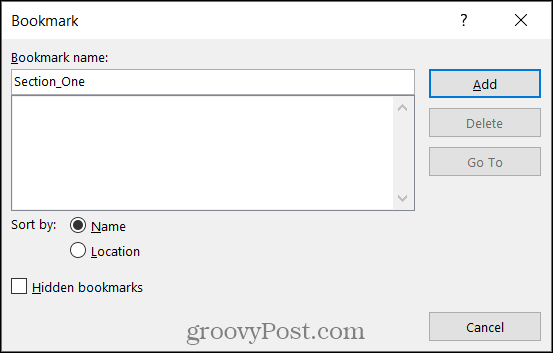
Now you have a bookmark attached to your item or document location. And you can continue to add more bookmarks the same way.
We’ll show you how to link to a bookmark in your document, but first, it’s important to know how to find them without links.
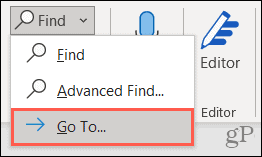
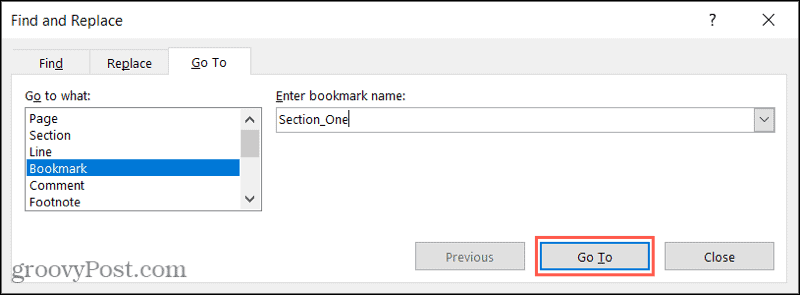
This will take you directly to the bookmark you entered or selected.
The great thing about bookmarks is that you can link to them in other places in your document. This works like a table of contents in Word, where you click the section you want to visit.
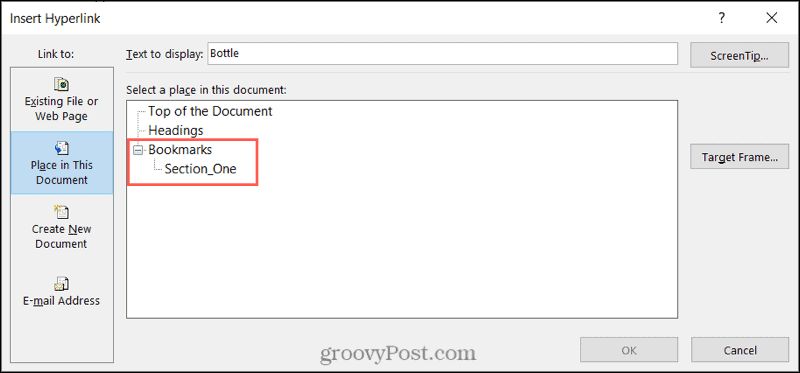
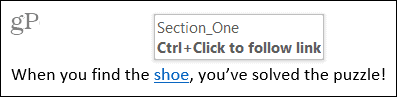
You’ll see the item you selected linked with blue underlined text. To visit the bookmark, hold your Control key and click the link.
If you create a bookmark that you want to remove later, this is a simple task. Go to the Insert tab and click Bookmark. You’ll see a list of your bookmarks in the box. Select the one you want to remove and click Delete.
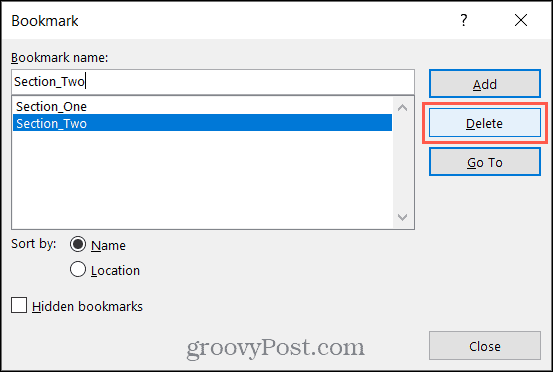
You will not be asked to confirm once you hit Delete, so be sure you want to remove the bookmark.
If you linked text to a bookmark as we described earlier and then deleted the bookmark, you’d need to remove the link from the text manually. This will not happen automatically when you delete the bookmark.
Go to the linked text, right-click, and choose Remove Hyperlink.

If you choose not to remove the link from the text or forget, holding Control and clicking the link will do nothing.
Using bookmarks in Word is a terrific way to jump to specific locations in your document. And if you’d like to link to another file, an email address, or a heading in your document instead, check out our how-to for that as well!
Stay up to date with more tutorials from groovyPost; follow us on Twitter or like us on Facebook!